We’ve spoken about the types of boards that usually appear in classrooms so lets look at things in a little more depth.
At the beginning of a school year it goes without saying that all your boards should have new backing paper and be edged also. Make this as colourful as you want as it really brightens up the room and don’t forget that the colours will also be shown in between the items that you put on the board.
So you’ve decided what board is for what subject / topic….ok lets look at things a little more closely.
TITLES / HEADINGS – there should be a big and bold title to a board that can be easily seen – it can be put across the top or even down the side of the board it really doesn’t matter. It can be in 1 single colour or multi colours again it doesn’t matter. But what does matter is that it should be of good quality and the right size !
You have 2 choices here
- You have stencils that are the right size and you have both upper and lower case letters. Draw round them and cut them out….hey presto instant title
- You are going to design your letters on the computer having first tried a “hand drawn” letter to get the correct size. Print them / colour them / cut them out and there is your title.
What I would not do is to print your title out on computer paper and then stick the pages up as your title…in my opinion its a lazy option….but again I have seen it many times and it never looks good.
If you really want your lettering to look good then you can cut each letter twice and then double mount to produce a sort of shadow effect.
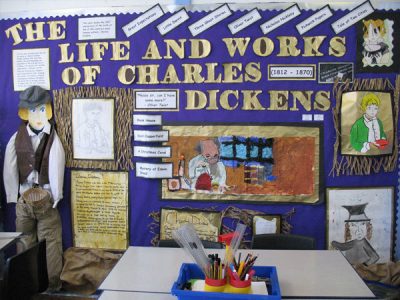
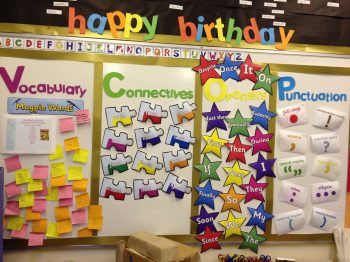 Someone’s been busy here – but its simple lettering and very colourful.
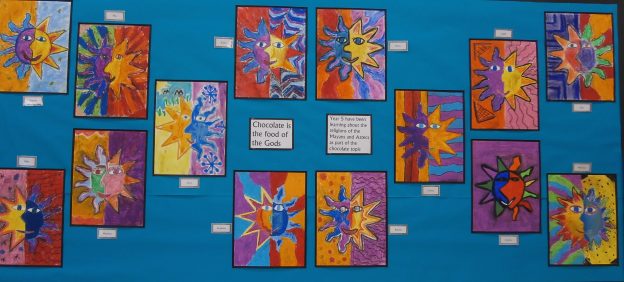
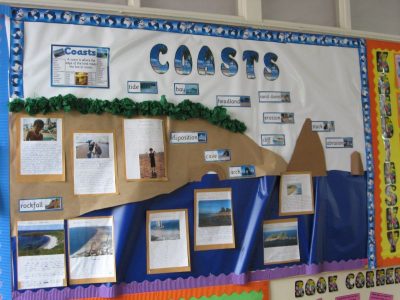
Here’s one that has been made especially to suit the topic – which looks good.
Your displays can be a mix of children’s work and information – if it is mostly information then there should be some explanation somewhere on the display board to inform what was being asked or done to produce this work.
Displaying children’s work – if its paintings then really you are just displaying what has been done (unless someone really has not put in any effort and its very poor quality – then ask them to repeat….and yes in their own time break / lunchtime if the lesson has finished)
If it is writing or drawing then you are looking for a more presentable finished result. The work could be done in draft and approved before a “display” copy is completed. Lets be honest, if the display is going to be up there for some time then you want it looking good!. Written work always looks better mounted – this means a piece of coloured paper slightly bigger than the work piece so that the edges show. This was very very popular years ago and double or even triple mounting could be seen!! To avoid having to cut the paper it is possible to buy mounting paper specifically for this job.
However, nowadays, its not as important so if you decide just to put up the work then I wouldn’t have a problem with it !….
Putting up your display – Plan out your display before you start stapling !! For this you need to use drawing pins and get the title up first. Pin up the letters and then stand back and take a look. By having pinned them you can make any adjustments you need if it looks wrong.
Once this is done then start pinning up the display and standing back – shuffle stuff around until you get it looking right…..NOW you can start to staple! Well done!
Getting things straight – I wasn’t particularly great with arty stuff so I soon came to the conclusion that it was a thankless task to get things straight and so I didn’t even try. I used to dot things around at different heights and different angles so I didn’t have to cope with this problem.
Generally this was as far as I went with my displays although the more artistic of you can venture into bending and folding the pieces of work to make them stand out from the board or have opening or sliding options to the display to reveal or hide work. The only limitation as we have said before is your imagination and the time you want to spend on it.
Other display options – There are other options or extras that you can add or direct your display towards.
- Interactive displays – these are generally information displays which can either precede a topic or follow on from a topic concerning work covered. The display will usually “remind” children about areas of the topic and ask questions about aspects of the work. These may be simple “”do you know the answer” questions or perhaps asking the children to complete or to physically interact with some “puzzle” on the display. They main aim is reinforcement and consolidation of material, although they may point the way forward for further study or investigation. …..doesn’t that all sound very educational !!!
- Table top displays – Usually practical work in the form of models that have been made to support a topic. These can be displayed either underneath a visual board display (which is nice if you have the room) or could be located somewhere else in the room. They should have a description of what the items/models are and also should have the children’s names shown
- Hanging Displays – If you ask the caretaker they will help. The usual way is to string fishing line across the classroom …wherever you want really ! On this line you can attach whatever you want. It may be literacy reminders / maths topic hints or general topic clues and prompts. These can be attached by using the very small pegs that can be bought online. The only problem with hanging displays like this is the height….put them too low and the children will use them for target practice !!
Well that sort of wraps it up for display – then main thing is to enjoy creating your displays and to make them bright and fun. They are an important part of the classroom environment and the children love to see their work being shown to everyone.
If you’re new to all this you will soon get into the way of doing displays – don’t be competitive with other classes but also don’t be afraid to ask for ideas of help.
Have fun !
Charles