
Welcome back to the flip side of the 2 part blog “Be ready” – we’ve already had a look at P.E lessons and if you haven’t looked at that then I recommend you hop there after this.
Art is another favourite subject for the University tutors and also for OFSTED inspectors as it takes a lot of organisation and lets them see you as a teacher who is in control of what is happening in your class.
Art usually requires a lot of preparation and possibly more materials than other lessons – so how do we get all this to gel together and produce a stress free lesson with great results?
 Again we’re back to organisation and how you approach this. If you’ve followed my advice (which is just that, advice only!) you will have Art monitors who can act like busy bees around your class for anything that is needed….I recommended 4 for a normal 25-30 size class.
For classes lower down the school – especially Rec and Y1 it is better and easier to set up the room before the Art lesson. This will give you as the teacher and your T.A help the chance to buzz about and set everything out . Of course in order to do this you do need to have timetabled Art in the correct place during the day to give you this time. If you did this lesson either after morning playtime then you have setup time and also lunchtime to dismantle. Don’t worry it really doesn’t take too long when the children are not in the classroom.
From Y2 upwards I would say that you should be able to set up the room at the start of the lesson and clear away at the end of the lesson. If that really is a long shot and you’re not too confident about that then set up the lesson before it starts but introduce clearing away at the end during the lesson. This has the added incentive that the children cannot leave until all is cleared away – so they will be less inclined to waste time!.
Most Art lessons require the class tables to be covered (unless you are in a very lucky position to have a school Art Room !) Tables are usually covered with newspaper (which you should have a big store of in one of your cupboards).
The setting up is done in stages which is masterminded by you with the able help of your monitors. But it is important that each step is completed before you move onto the next. If you have to wait for 1 table to get organised then say so and wait….children soon speed up when they realise they are holding everyone up.

Once all the stuff has been handed out then you can tell the children to start – move round the room commenting and praising as necessary and of course being aware of the capabilities of each child. This means what is a great standard for 1 child might be poor for another but it is still a success.
If necessary – stop the whole class at any point to make “artistic comment” or observations or just to give instruction about how to do something better. This, as we have said before, has the effect of calming the atmosphere, putting you in charge and correcting any mistakes.
If you do see something that is totally unacceptable then don’t be afraid to say so and tell the child to start again…..
Differing Art activities –
Of course there are many different Art activities and the scenarios will vary from activity to activity. Here’s some hints that might help…
- Painting – relatively straight forward but put out equipment in steps and don’t start until everyone has all the stuff and is ready to start.
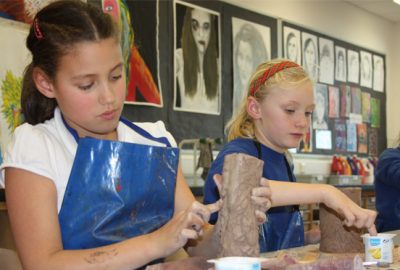
- Clay work – modern clay does not need to be fired (it did years ago and schools had kilns!). The children need the appropriate boards and clay modelling tools for this. Be aware that there is the opportunity for jabbing and prodding with these tools and I would pre warn children that if it is seen then they will not continue with the work and have to sit out and do maths or handwriting etc. (this should prevent but just be watchful). Depending on the complexity of the task you can either approach from a demonstration by yourself and then they can have a go or the alternative is to do a step by step approach where you show for example how to roll a body (then everyone has a go) …when you are happy with this you demonstrate the next bit etc etc until everyone has a finished piece (which is hopefully recognisable). Don’t forget that you will need small bits of paper with the childs name underneath to ID the item/ child. If it is possible their initials may be scribed under the item.
- Cards – At various times during the year you will need to make cards. I always found that some simple novelty card suited things best rather than just a straight forward piece of A4 folded in half. Practice at home yourself and depending on the age of the children you can pre-prepare to where you think you will need to start. Again I think Y2 would be my first class with NO preparation (but it will be slow going). Cards are best made step by step with you leading from the front. In between each stage you charge about checking everyone has done it correctly and correcting any errors. You will be measuring, drawing lines, cutting and folding step by step as a class until the card is made. Individuality comes in the design and art work by the children. However you may wish to also structure where messages and names are put! (I will be doing a blog on how to make my famous “pop up” card before Christmas – its a winner !)
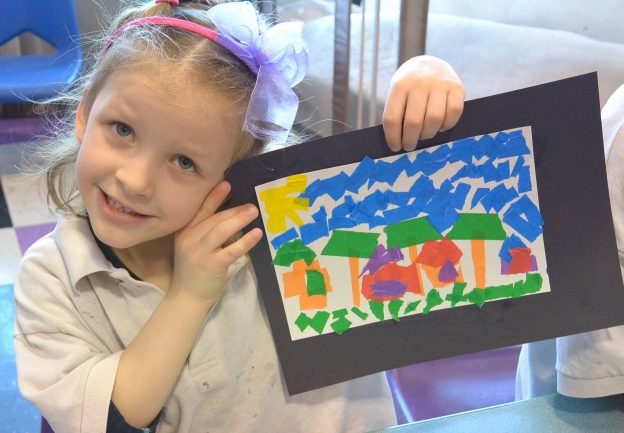
To be honest there are very few occasions where, as a teacher, you would not have an ongoing input into an Art lesson. It is always great when the class is stopped and the teacher holds up a child’s work to say how great it is – or how well they have used the colours or the superb sky / sea.
Clearing up – This can be the most challenging aspect for some teachers. Again be organised and use your monitors. Split the tasks down into sections and do each separately. All children should have stopped work and put any materials/ equipment down. Send out the monitors to collect in 1 particular item….lets say water pots are first ( not a bad idea…get them out of the way!). These are brought to the sink (you may not need to use all your monitors to collect things and so perhaps 2 monitors can be washing up in the sink if you have one) . Next are the brushes and so it goes on until only the newspaper is left. At this point stop the class – children are more than keen to just mash the whole lot together and shove it in the cupboard,,,,but not for you. Tell them it has to be sorted nicely together and not a mess and put in the middle of their table. You move about the class and either say yes or no as to whether it is good enough (Initially you will find none are done properly so don’t accept). If it takes for ever then tell the class it is not good enough and get them to practice putting out newspaper and collecting it in during a playtime….it certainly focuses the effort !
Other art activities are easier to clear up – but don’t forget names on work or it becomes a puzzle! Again use your monitors and oversee things yourself.
You should be aiming for a total clean up after an Art lesson in less than 10 minutes….if you schedule it before a break (playtime, lunchtime or home time) then you will find it spurs things on!
Art lessons can be great fun but if you are not organised and the children do not know how to act and behave then they can quickly get away from you. Don’t let this happen. Getting a class organised in both Art and P.E takes some time but its worth it in the end as you will find the stress and worry disappear and the lessons flow much more easily and successfully.
It still wont prevent the water pot getting knocked over though !!
Primary Practice would like to invite you to join our NQT and trainee teachers Facebook group https://www.facebook.com/groups/1347401775298840/?ref=bookmarks
Have fun….Charles